|
|
|||||
|
|
|||||
| The rebuild of Tauhara | |||||
 |
|||||
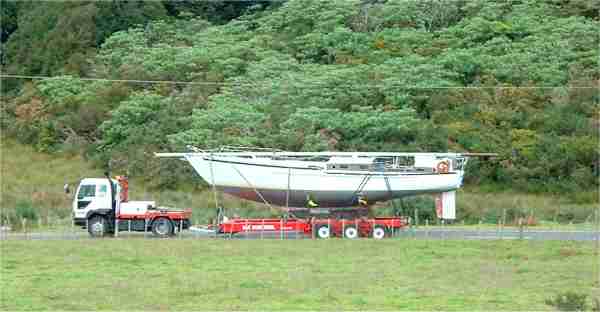
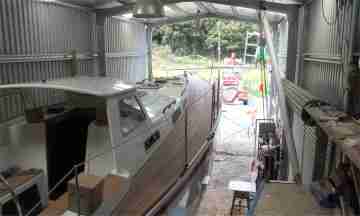
| In April 2004 Tauhara was lifted out of the water, scraped clean of years of antifouling and transported to the shed we built in the corner of the property. | |||||
|
It took until August 2004 to get the hull empty and
reasonable clean. It took a 2 ton truck 4 trips to the tip to dump the
interior, even though useable bits were kept.
A work space was created next to the boat on deck level, 3 meter above the ground. A 5 meter workbench with a bench saw was on it, plus most of the tools. |
 |
||||
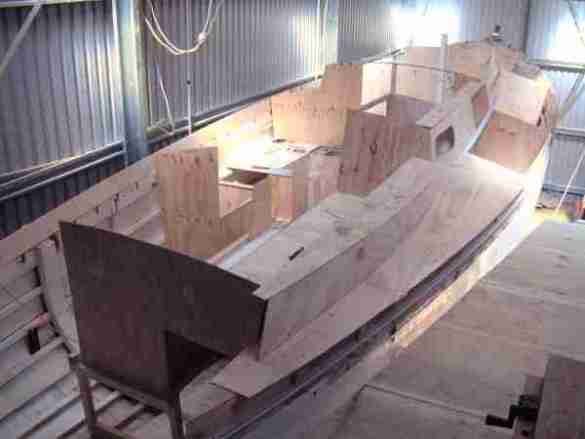 |
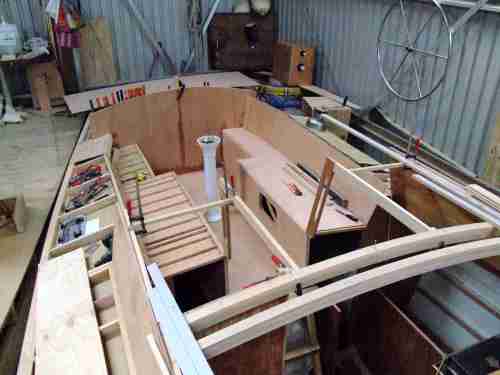
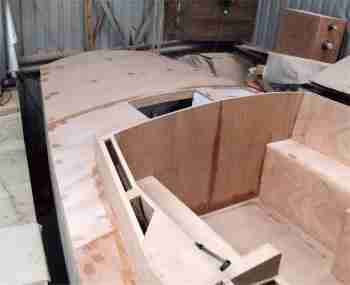
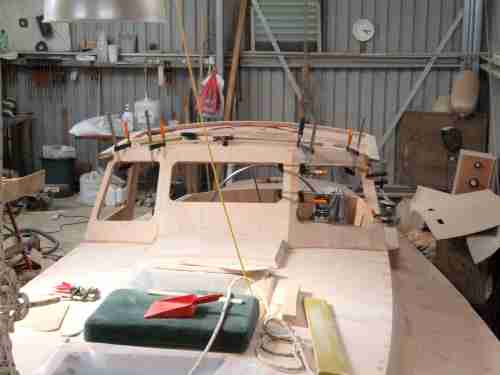
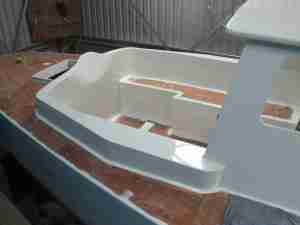
Next a mock up was made, using 15 sheets of very cheap
ply. Most of the interior was designed this way. The cockpit was only a half
model, to allow easy access to the rest of the boat. Not much has changed since then. Bit by bit the mock interior was replaced by a real one. All interior is in Kauri, Fijian kauri in this case, since there is no New Zealand kauri in plywood form. |
||||
 |
 |
||||
|
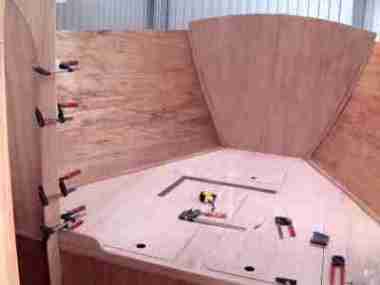
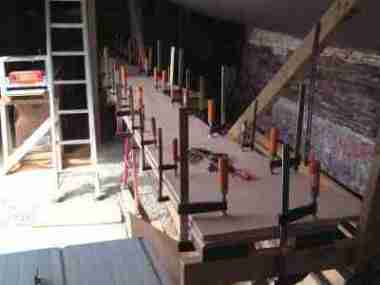
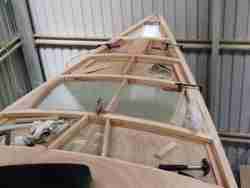
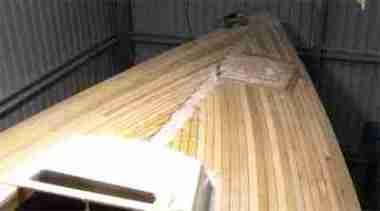
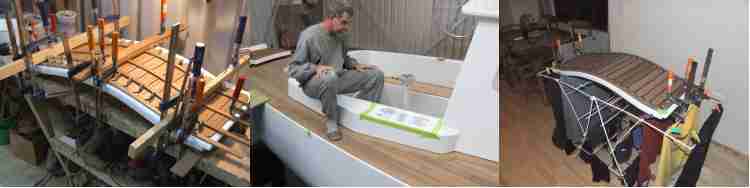
Forepeak |
Laminating the sides to get rid of the step in the deck | ||||
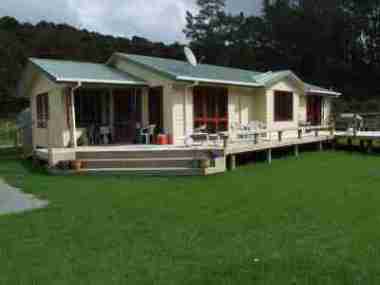
| In February 2005 we sold our house and had to move out. The new house was not ready yet. For the next 8 months no work was done on the boat. There was a lot to do before we could put a new house and all the animals in a 10 acre paddock. The house arrived on 15 April. Floors had to be laid, decks built, cabling done etc | |||||
 |
 |
||||
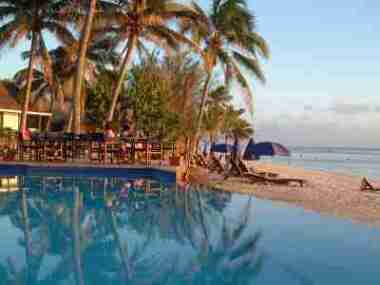
| After a nice relaxing holiday in Rarotonga, I slowly started building again | |||||
 |
28 November 2005
|
||||
 |
 |
||||
| Building the cabin sides out of 4 layers of plywood | Laminating deck beams | ||||
 |
March 2006.
|
||||
|
Finally all hardware is complete.
The engine sits in its final place. The shaft bearing
is fitted, the stern tube and the strut. The diesel tank is now lowered
behind all this and the lid closed. |
|
||||
 |
6 May 2006 | ||||
|
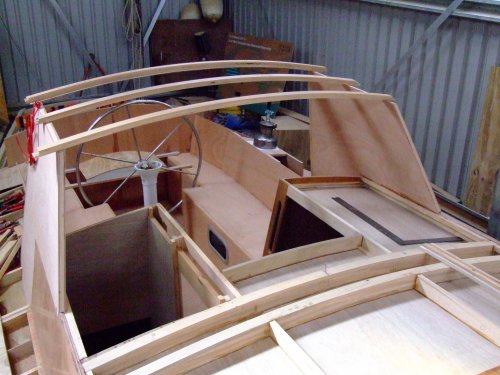
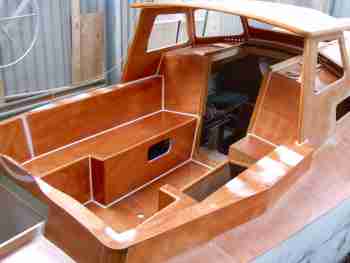
The Cockpit is taking shape End of May 2006 |
|
||||
 |
Early July 2006 | ||||
|
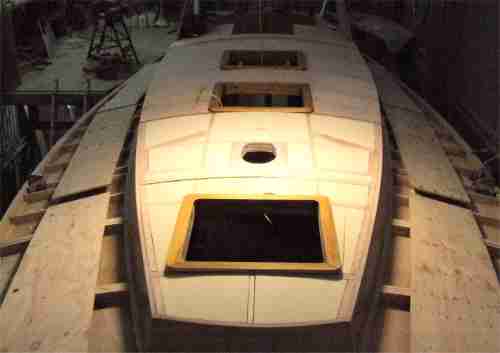
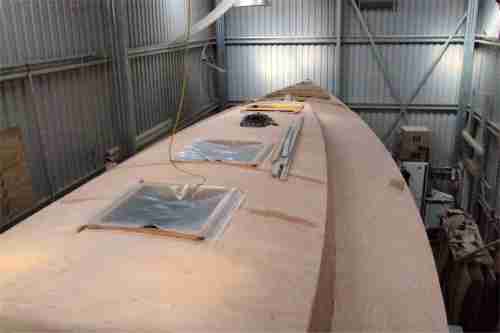
August 2006 The cabin roof is now closed, the blocking for deck hardware put in and all remaining space filled with polyurethane foam. 2 layers of plywood will come on top of this |
 |
||||
 |
2 September
|
||||
 |
|||||
| Time for some relaxation. Rarotonga is still as nice as it was last year! | |||||
 |
 |
||||
| Mid October 2006 | |||||
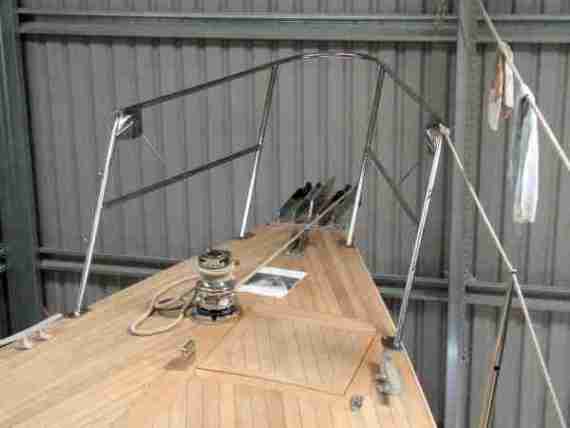
| A lot of work is going into the ends of the boat. The more you do without a deck on , the easier it is. So all steering hardware, including the brackets for the autopilot, are fabricated and mounted. The whole lot gets a few coats of paint too. The anchor well gets treated with 4 layers of epoxy and some glass, to make it watertight and resistant against abuse by the anchor chain. | |||||
 |
 |
||||
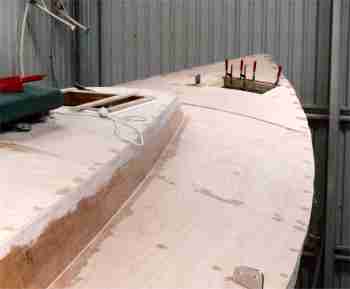
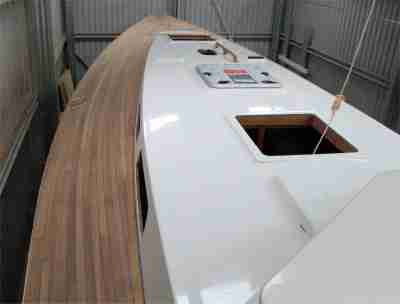
| 23 October 2006 The ends are covered. The deck is closed | |||||
 |
6 November
|
||||
| 16 November |
 |
||||
 |
 |
||||
|
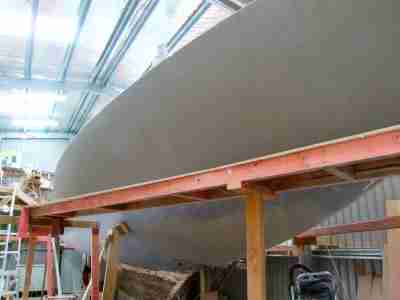
14 December A lot has happened even though it is not that visible. The shed has been modified and scaffolds built right around the boat. A lot of sanding has been done to fair the new timber in with the hull. |
|||||
|
|
 |
||||
| 6 January 2007. Ready to be glassed! | |||||
|
21 January
|
 |
||||
 |
Sanding, sanding, sanding..... A nice opportunity to check the fitting of the windows |
||||
|
27 January
|
 |
||||
 |
A day later......
|
||||
|
10 February
|
 |
||||
 |
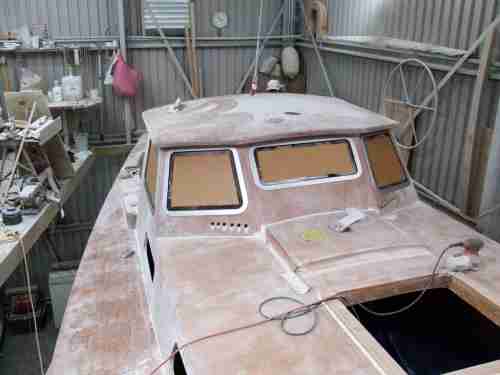
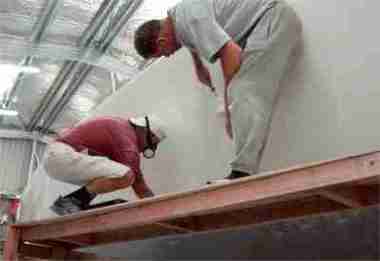
After the first coat of undercoat we are in battleship mode again. But it looks good already! | ||||
|
The battleship grey has been overpainted with 2 coats of
white special filling undercoat. Most of
that will again end up on the floor! |
 |
||||
| 19 Feb 2007 | |||||
 |
 |
||||
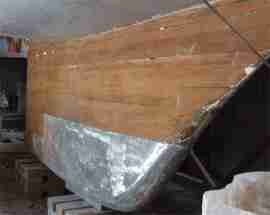
| The keel also gets a cleanup. It will be sealed in epoxy and glassed. |
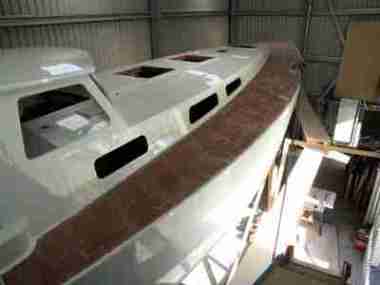
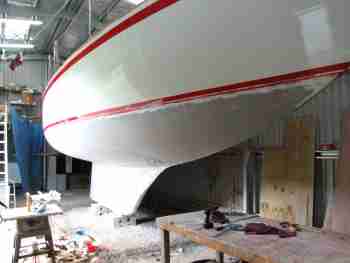
5 March 2007 Finally after a lot more sanding and another coat of undercoat (also sanded again of course) it was time to put the first layer of real paint on the hull. |
||||
 And it already looks good! |
 |
||||
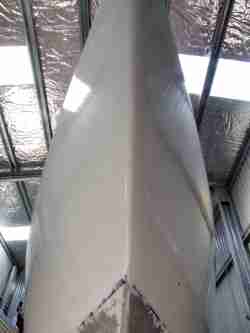
| The next 3 weeks we battled with the paint. It did not work the way it should. It looked OK, but not perfect. So we sanded it all smooth again and had another go. We did the hull 3 times and the top twice. We were not happy. We decided to buy a tin of another brand and put it on the top. What a difference! We lightly sanded it and put up another coat the day after. This was it. This was how it should have been. Today we put a coat of the same on the hull and it sure looks good! (26 March 2007) | |||||
 |
 |
||||
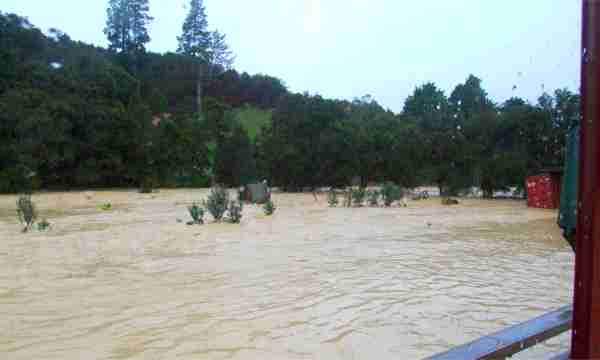
| The Mother of all Floods | |||||
 |
|||||
| Another delay in the boat building schedule. You are looking at our lawn from the deck. The container in the background is trying to float away. Luckily there was a roof attached to it, so it more or less stayed there. We lost numerous bits and tons of plywood, which was all stored under this roof because the shed needed to be clean. The boat had its keel wet, up to half a meter. All fences on the flats were gone, the bridge disappeared and tons of rubbish and silt were left in its place. And all that while we were ready for the final coat of paint! | |||||
 |
By
Easter we had the shed cleaned up, a fresh load of metal on the ground and
finally the last coat of paint applied. |
||||
|
21 April 2007
|
 |
||||
 |
 |
||||
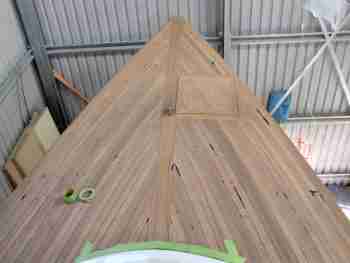
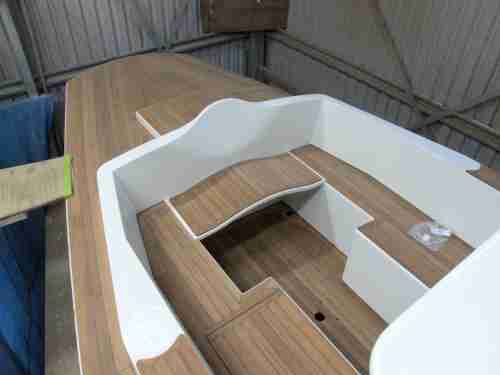
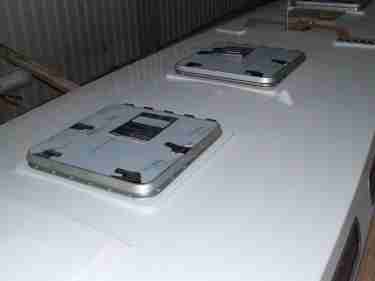
| 20 May. Most of the teak is on! | |||||
 |
 |
||||
| 28 May Just the piece in the middle and finishing the hatches! | |||||
 |
 |
||||
|
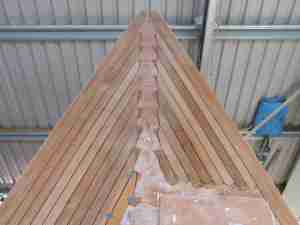
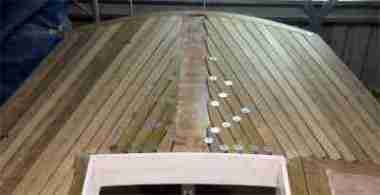
18 June 2007 After all planks are glued on, the seams are filled with black epoxy. That took a whole week with a syringe that would frighten a cow! Then the whole deck was sanded to a smooth finish. The blobs visible on the picture are air bubbles filled again with epoxy. |
|||||
 |
 |
||||
|
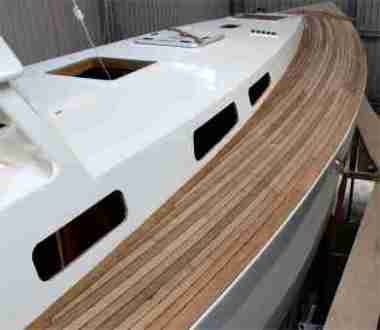
The finished result! |
 |
||||
 |
|||||
|
9 July. |
 |
||||
 |
 |
||||
|
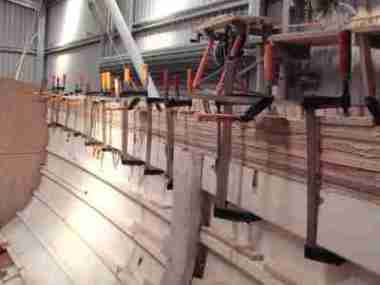
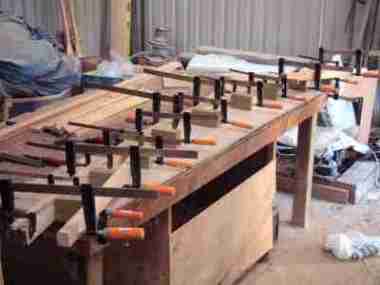
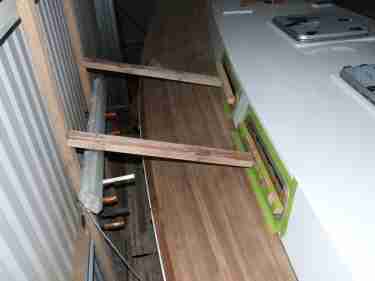
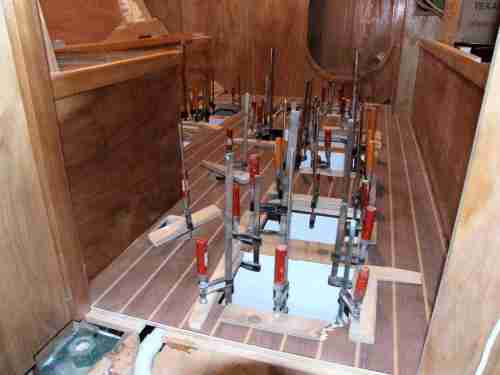
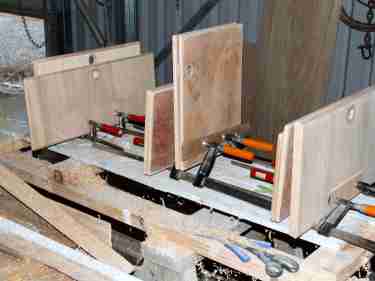
26 July
How many clamps can you fit on a floor? |
 |
||||
 |
20 August |
||||
 |
 |
||||
|
Some deck hardware has been fitted too.
The genoa tracks have around 50 machine screws all the way down into the
hull timer embedded in epoxy. I hope to never have to replace those.
Needless to say you can lift the whole boat up on these... |
 |
||||
|
1 October.
|
 |
||||
 |
|||||
|
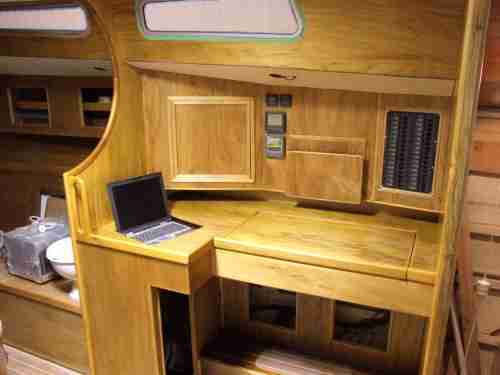
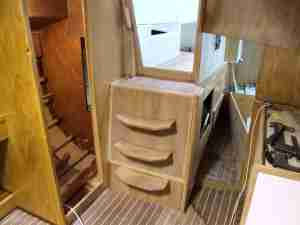
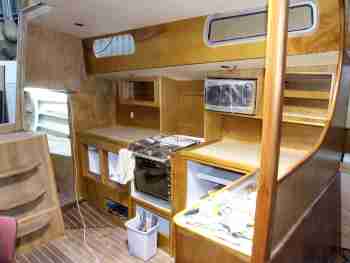
29 October The chart table is finished. Some expensive items have already been mounted. The big closed door will get holes in it where radios etc will poke their noses through. We haven't got those yet. Under the chart table will be the power converters etc. All wiring will terminate somewhere behind all this and will get connected to switches and batteries. |
|||||
 |
 |
||||
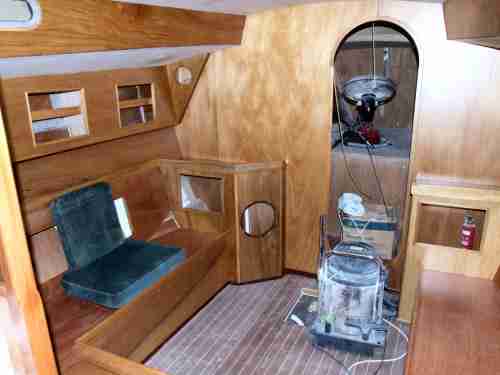
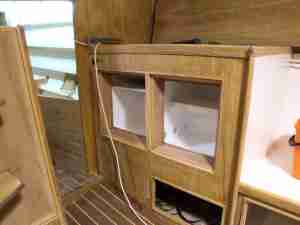
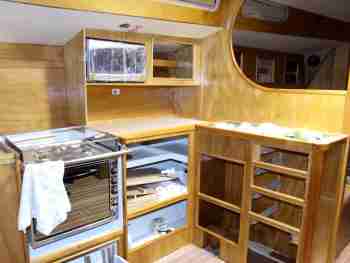
| The fridge has been built in. Around the inside box is on average 100 mm of polyurethane foam. In the locker under it a water cooled compressor will be fitted. The doors will be a challenge to make..... Also the entry has been upgraded from some four by twos to a decent stairway. It also hides the iron sail. There will be a berth in the back cabin next to the stairs. I just put the floors in for it. | |||||
|
It is now December and a few very visible
jobs have been completed. |
 |
||||
 |
 |
||||
 |
 |
||||
| Finally the shed has been cleaned out. All scaffolding has gone and so have the supports for the boat. Oops! Fortunately I bolted the hull to the shed before that was done. When you step on the boat now, the whole shed wiggles..... | |||||
 |
 |
||||
|
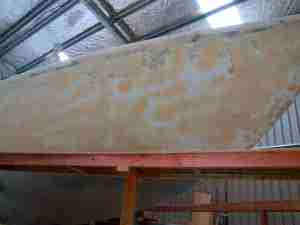
The whole hull was now sanded, filled
where needed and coated with epoxy based undercoat, about 2 layers, some
more in places. |
 |
||||
 |
|||||
| Happy New Year to you all | |||||
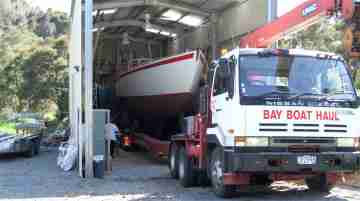
| 17 January 2008 The Big Day Out !! | |||||
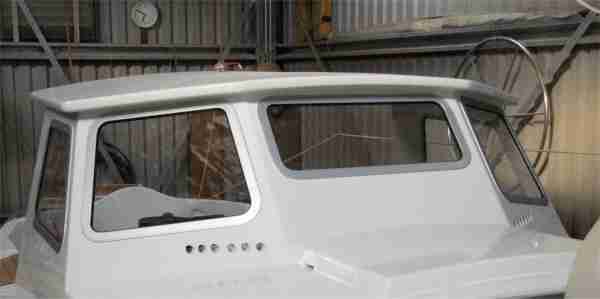
| The front door of the shed is being opened |
 |
||||
 |
 |
||||
 |
|||||
 |
 |
||||
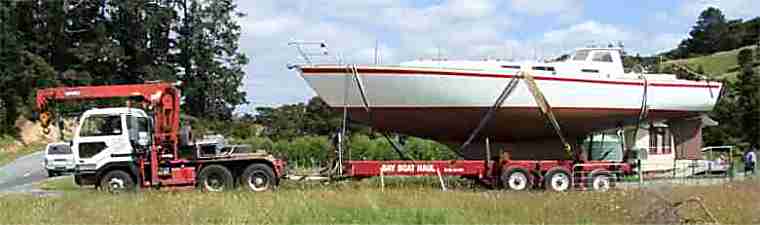
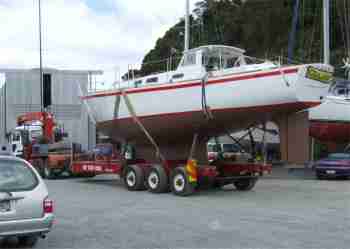
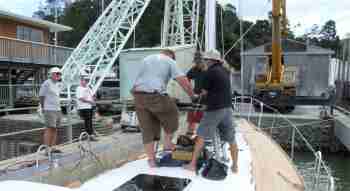
| After opening the shed, the truck moves in with a big hydraulic trailer. The boat gets lifted off the blocks, secured and off we go. It took about half an hour to get to Opua, having made some special arrangements to get through the road works. There she was hoisted off and thrown into the water | |||||
|
Paul and the boys were ready waiting with the mast. A big crane had to come in to put this 20 meter piece of metal into the boat.. |
 |
||||
 |
 |
||||
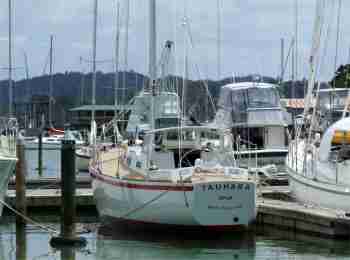
| After fitting some terminals to temporarily secure the mast, we got towed to the marine where the work will continue... | |||||
|
It is now April 3rd. I did not update the
website, since there was not a lot to see. A few kilometers of wire has been
pulled in and connected. Plumbing and pumps have been installed. Teak trims
have gone in. Sails have been added and a lot of invisible things have been
done. |
 |
||||
 |
 |
||||
 |
 |
||||
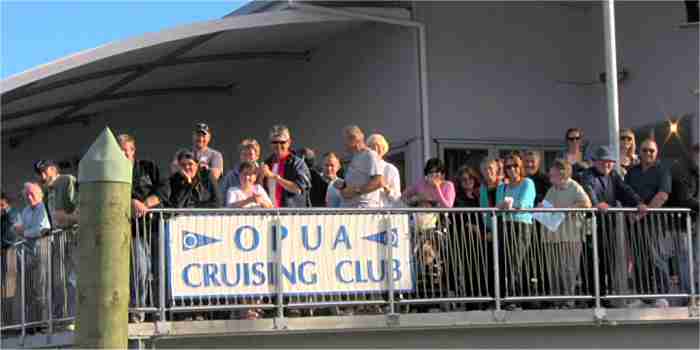
| 3 May 2008 | |||||
| On our way to the Opua Cruising Club, where the official launching ceremony will be held |
 |
||||
 |
|||||
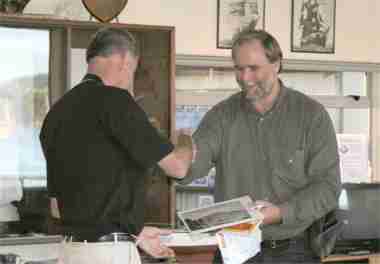 Speeches were held. The original owners of Tauhara presented us with a reproduction of a painting of Mount Tauhara, which will find a place on board. And then the big bang.... |
 |
||||
|
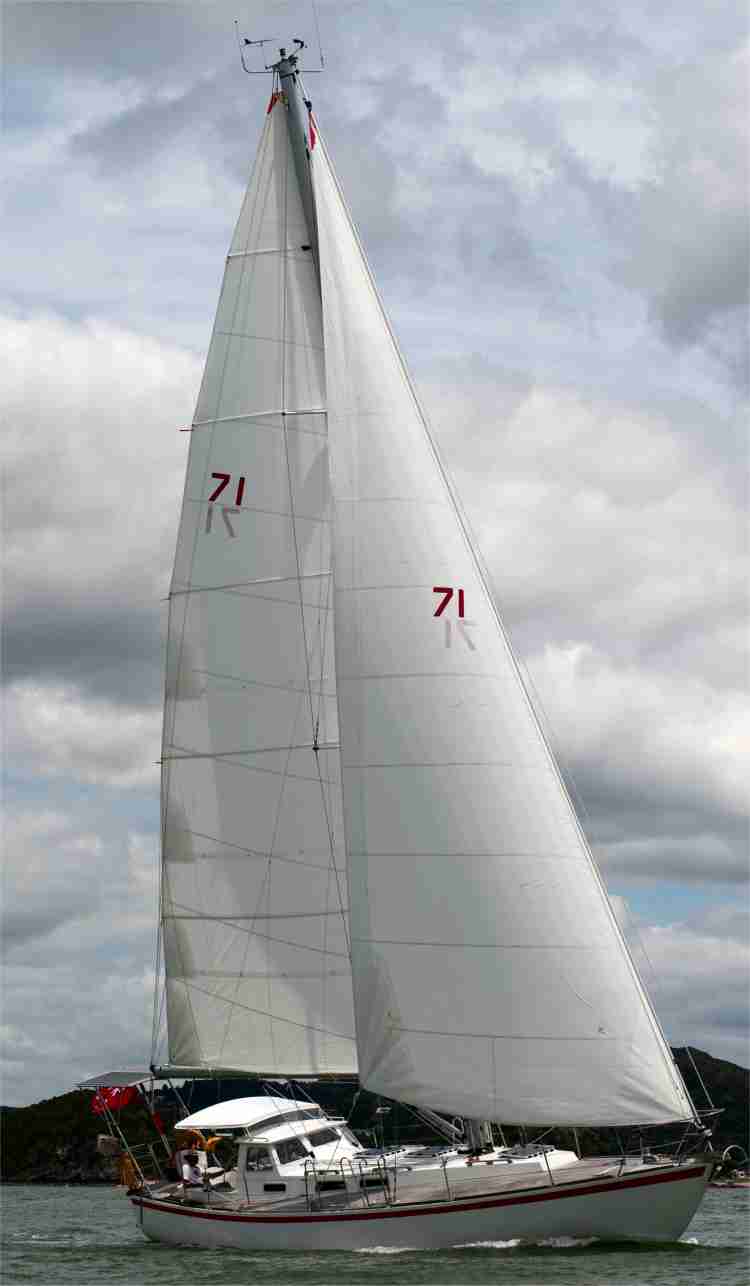
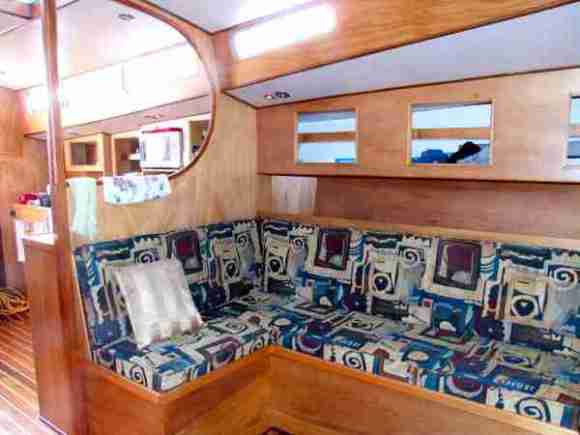
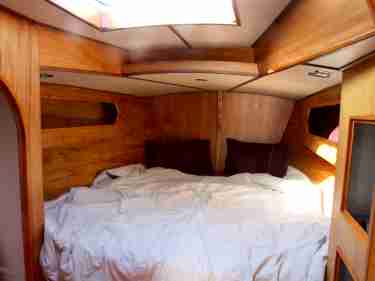
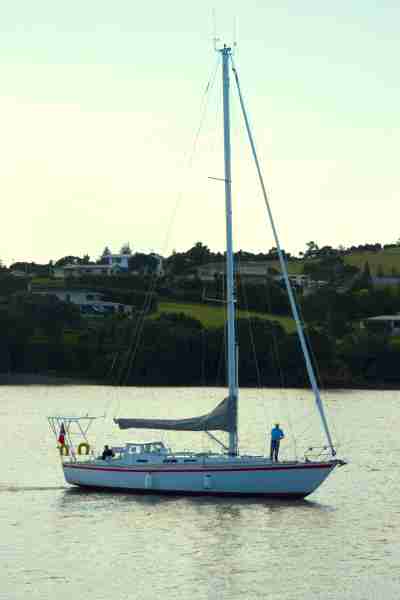
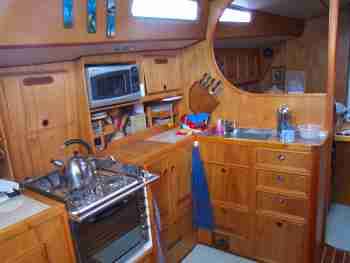
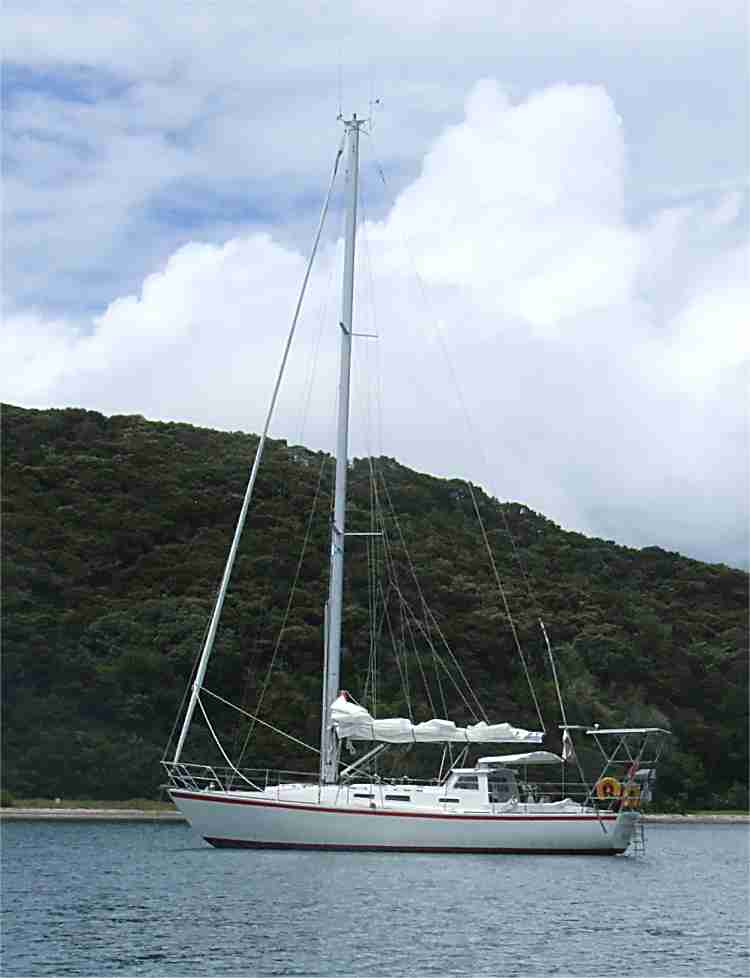
We have been living on Tauhara now for over half a year (January 2009). Here are some pictures of the interior and a few at anchor and while sailing (courtesy of JP). |
|||||
 |
 |
||||
 |
|||||
 |
|||||
|
|
|||||
|
|
|||||
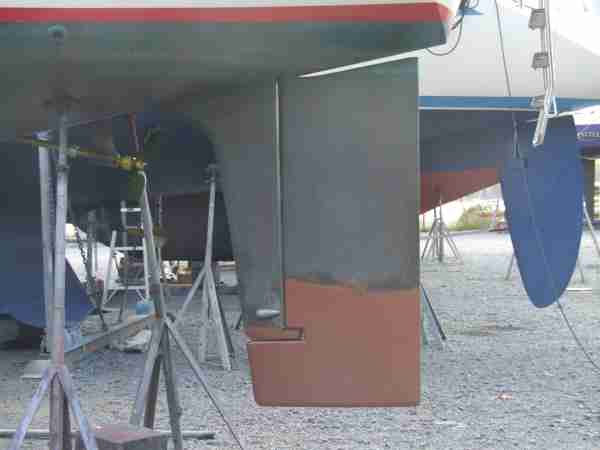
| January 2009 | |||||
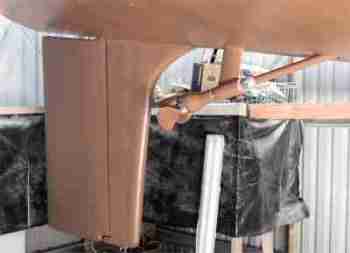
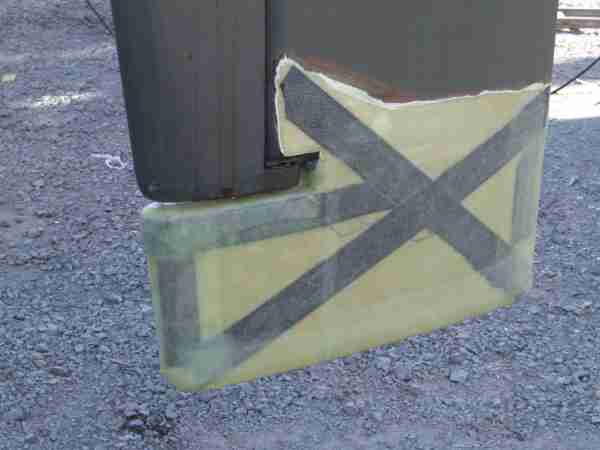
| With the limited sailing we had done up to this time we found that the autopilot had problems steering the boat specially running with 20 plus knot winds. Manual steering would would, but with excessive rudder angles. To address this we decided to increase the rudder size. Making it deeper made more sense than wider, so deeper it was. Since it would be hard to weld more steel in without wrecking the existing rudder, I decided to use carbon fiber as reinforcement. The added advantage is that when something big would hit the bottom part of the rudder, it will just break off, leaving the original one in one piece. Here some images. | |||||
 |
|||||
|
|
|||||
|
The result was better than hoped for. The autopilot has
steered the boat around the Pacific for 6000 miles and the few times I
decided that I should take over, I quickly passed control back to it, since
it simply did a better job that I. Even in 40 knots with just a reefed
mainsail it steered without a problem. The other problem was going astern. It basically did not work. The boat would go sideways with lots of water movement and the engine would do full revs without moving the boat much. It looked like the folding propeller was not opening properly, possibly because of the skeg and the slightly offset position of the shaft. We decided to get a "KiwiProp", a feathering prop with composite blades. (www.kiwiprop.co.nz). The result was astounding. When lowered back into the water, I put the engine in reverse and we shot out of the travellift bay at high speed. We never looked back! |
|||||
|
|
|||||
|
February 2010 |
|||||
|
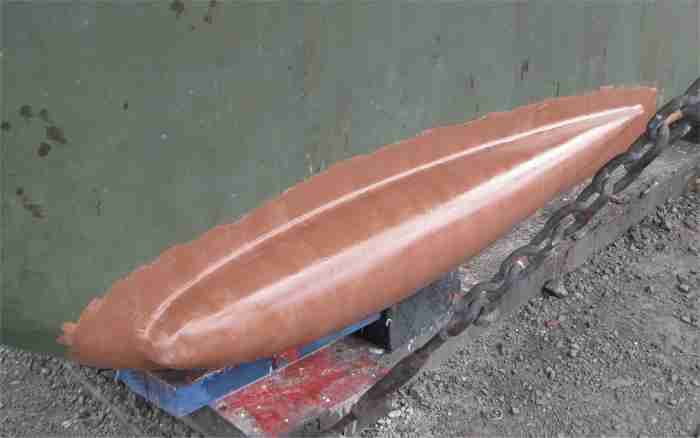
During our Pacific trip we found the boat a bit tender.
It would heel more than it should for the wind speed. Maybe the rebuild had
made the boat too light. It was still floating well above the waterline with
full tanks and food (and drink) for a year on board. To address this we decided to add some lead to the keel. Since the draught is already 7 feet, it had to go on the side somewhere, as low as practical. So the idea was born to add 2 half bulbs to it. After some googling and a hefty streadsheet a mould was made. |
|||||
|
|
|||||
| The mould went to Whangarei and 2 pieces of lead came back a week later. They were bolted on and faired in. | |||||
 |
|||||
|
|
|||||
| They were mounted as far forward as possible, since the bow always was a bit up. We have just gone back into the water. The boat is now straight on its waterline, about 20mm lower. It feels more stable already walking around, and according to the rigger, who had to go to the top of the mast, it did not feel "like a cork" anymore. Once the sails are back we will try it out in real life! | |||||
| We had our seatrial and it was a big success. Instead of having to reef at 15 knots going upwind, we now sailed in 20 knots with the full sails on. Also the speed going upwind increased, probably because we sailed more upright. So it has been worth the money and effort! | |||||
| January 2013 | |||||
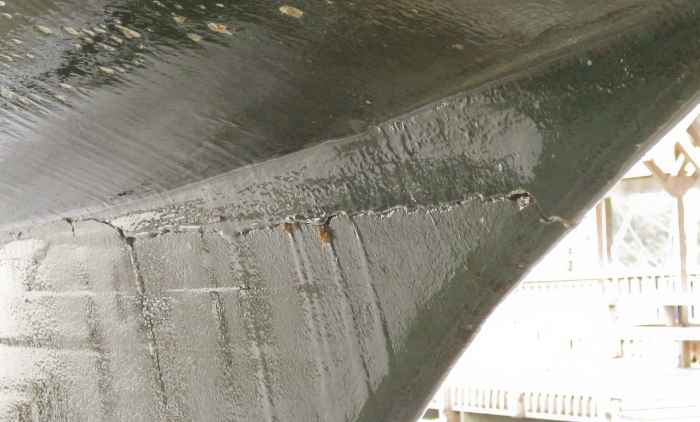
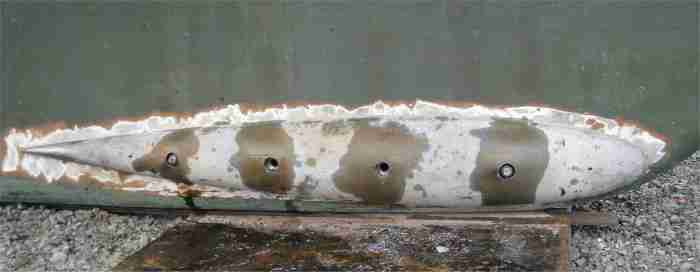
| After 26000Nm and 5 years we hauled out in Opua to inspect the bottom and if possible to permanently fix the leaking. The feeling was that it came from the keel area, even though inside the boat it came in at the front. This is what we found. | |||||
|
|
|||||
|
In the late 1990's the keel had been separated from the
hull to inspect the keelbolts. When the keel was joined again, a flexible
sealant was used to make sure it was watertight again. This was all fine,
until we started sailing the boat hard. Of the 26000Nm we sailed about 10000
were hard on the wind. This made that the keel started moving slightly which
sucked in a bit of water with every wave. Normally the leaking would stop
after a few weeks at anchor. When we hauled the boat and pushed against the
keel while hanging in the travel lift, water would push out of the seam
where is was joined. The top of the keel and part of the bottom of the boat were grinded down to bare wood. The seam was routed out to about 20mm deep and 10mm wide. This was filled with epoxy with high density filler, so the keel was now supported on both sides. Then the whole join was heavily glassed in and faired. All keelbolts were services and tightened. |
|||||
|
|
|||||
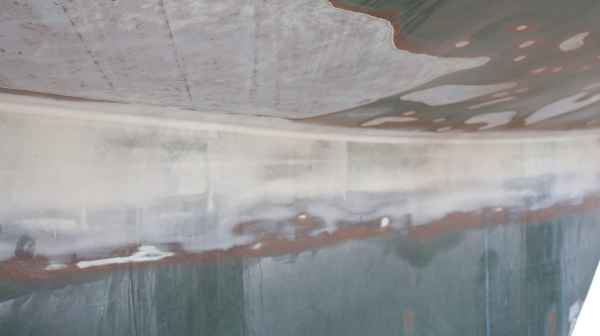
| Parts of the bottom got sanded down and faired. Any irregular areas got the same treatment. Next all bare areas got a fresh layer of CopperCoat, including the waterline, which was getting a bit thin after cleaning it often in the tropics. | |||||
 |
|||||
|
|
|||||
|
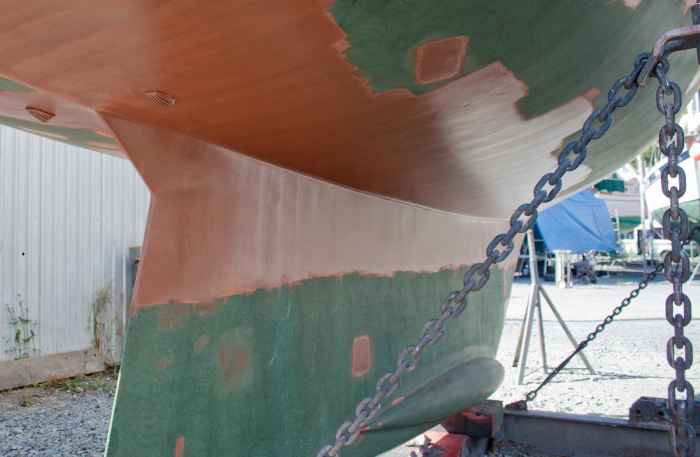
Ready to go into the water again. The green areas is
existing CopperCoat, the brown is fresh. The propeller was serviced, the
cutlass bearing replaced and a few zincs. The bilge is completely dry now. The keel can't move anymore. Ready for the next adventure...... |
|||||